The first step is always to choose a high quality, high resolution source image. That means an image that already has good contrast and definition, and is finely focused. A dull grey image which is out of focus is never going to give you a good engraving.
Choosing a source image.
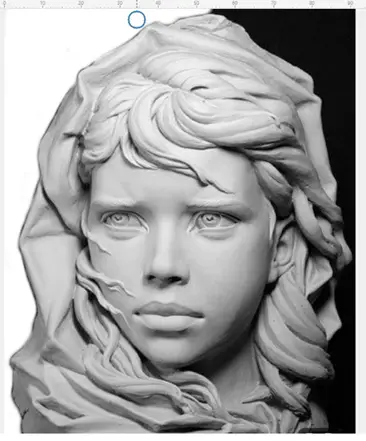
For this demo I have chosen this photo of a girl wearing a head scarf.
It already has good contrast, is well focused, and a pleasant photo to look at.

The first thing I need to do is remove the black background, because I am going to engrave it on wood.
Removing the background makes the viewer focus on the face more, and also reduces the burn time, because the background will be white.
NB. If I was engraving on black painted tile or canvas, I would leave the black background in, because when I invert the image to a negative, the background will be ignored, only the white parts of the image will be burned. Saves time.
Removing the background.
I use Corel Photopaint to pre-process the images for engraving.
Why, because I have been using it for over 40 years and I am used to it.
You can use any graphics software you like; they all basically do the same thing.
Photopaint, Photoshop, Gimp, Paint, or even Lightburn’s built-in graphics functions.
Some people use Android apps that are specifically designed to remove the backgrounds from photos.
I use 2 different tools for removing the background.
Sometimes I just use the paintbrush tool to paint the background white.
Sometimes I use the polygon tool to draw a white filled shape as I trace around the outline.
Paint brush tool.
I start off with a very large brush size and brush away the bulk of the background.

Then I make the brush a lot smaller, and very carefully brush right up to the edges of the image.

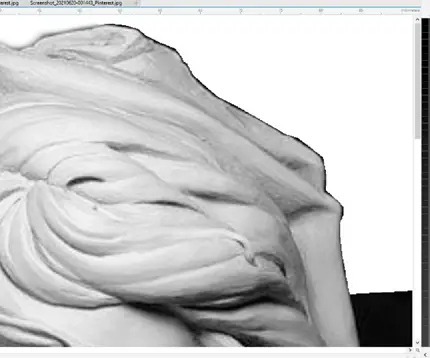
In this example, I have removed the left side of the background with a paint brush.
The Polygon tool.

With the polygon tool, you click around the outline of the image, click around the outside of the image, and go back to where you started, and that area will be filled with white.
Can you see the thin line that surrounds the top right corner of the background.
When you double click it fills the area with white (or whatever color you previously chose).
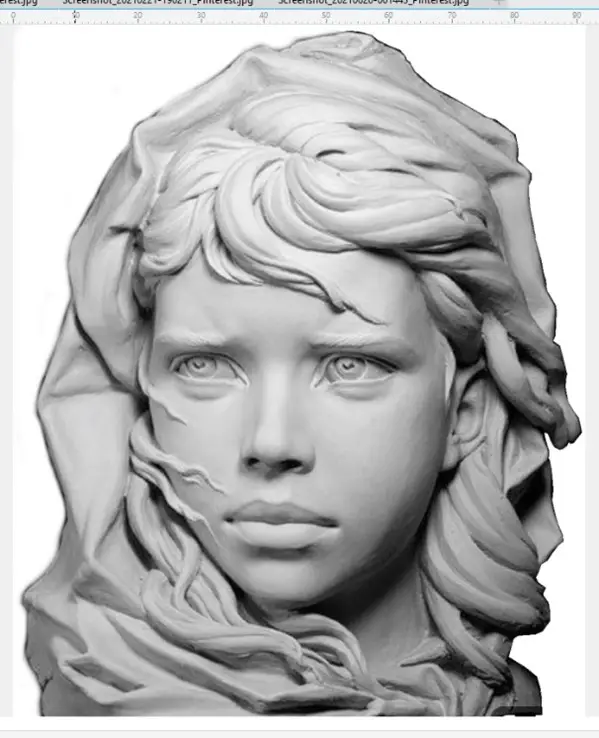
Repeat this process of removing areas of the background until it is all gone.
Adjusting the Brightness and Contrast of the image.
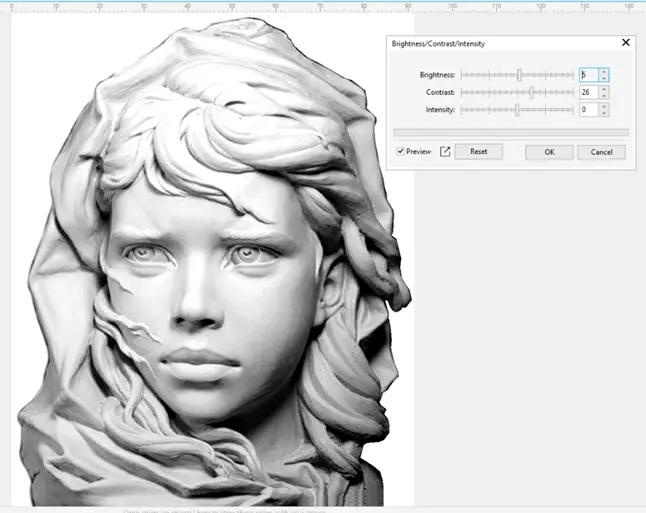
This image is rather flat and dull, the greys are all very similar, so I want to increase both the brightness and the contrast to give it more visual impact.
The Brightness Contrast Tool.
By increasing the Brightness by a value of 5%, and the Contrast by 26%, I can make the image much more eye catching and visually stronger.
Now I need to adjust the dpi of the image to match the dpi of the laser beam. In my case 318dpi.
And also adjust the size of the image to match the size of the piece of wood I am going to engrave. 370mm tall.
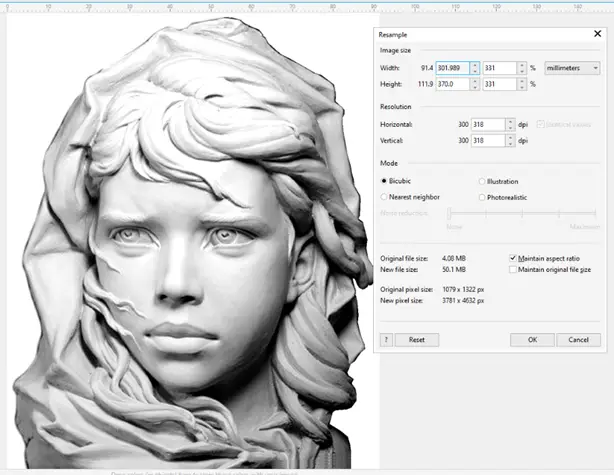
Now all I have to do is save the processed image and import it into Lightburn.
Lightburn settings.
With my ORTUR LM2 20W PRO laser, I usually burn wood at 9000mm/min, 58% power, 318dpi and Atkinson dithering.
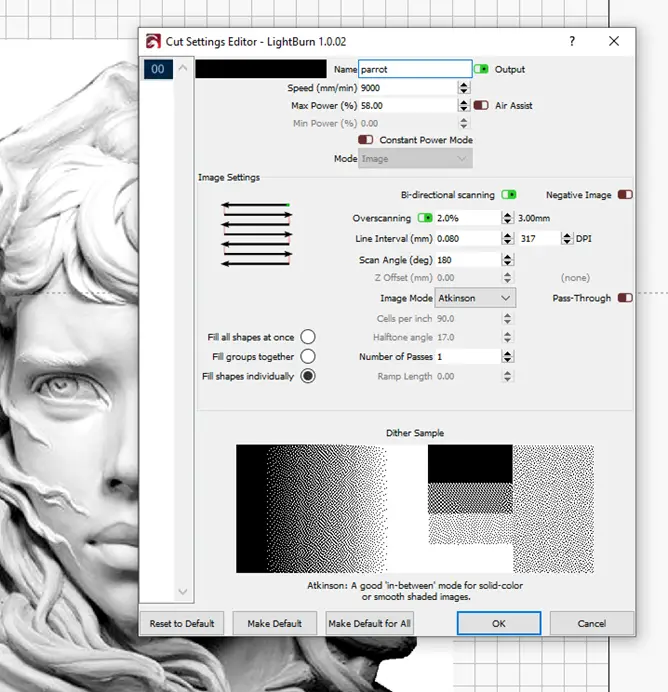
An image this size will take about 2 hours to complete at this speed and dpi setting.
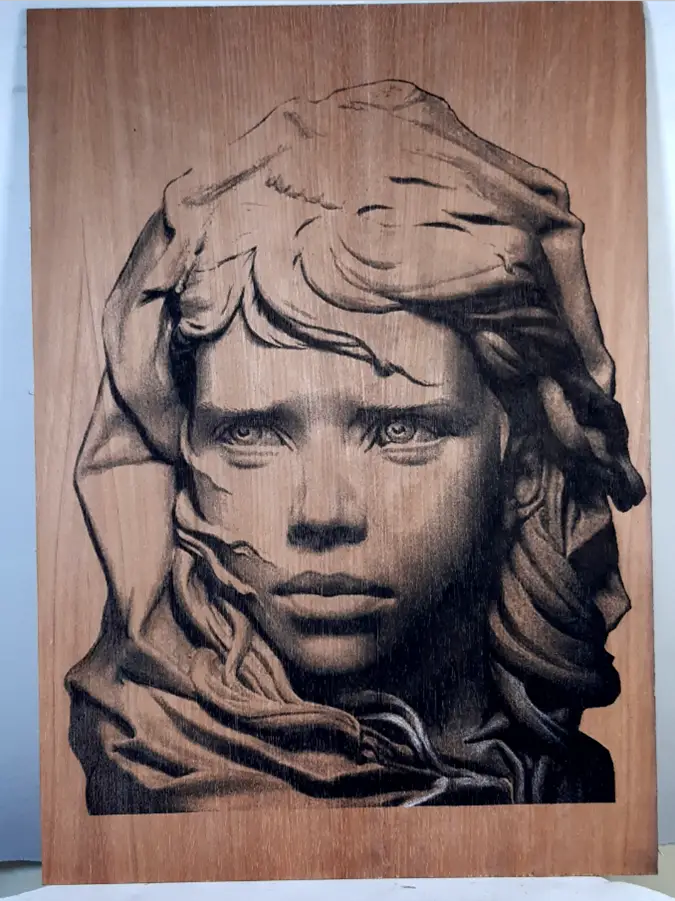
When it has finished burning, you will obviously see that the blacks and greys of the image are all there, (depending upon you getting the settings correct), but of course the white parts of the image are missing.
NB. The type of wood you use will greatly affect the quality of the black and grey areas in the engraving. If the wood hasn’t burned as dark as you expected, you have 2 choices ;
- Change the settings and burn it again on another piece of the same wood.
- Or touch up the blacks and greys with a black coloring pencil. It’s a lot faster than repeating the burn.
Adding the white highlights to the finished burn.
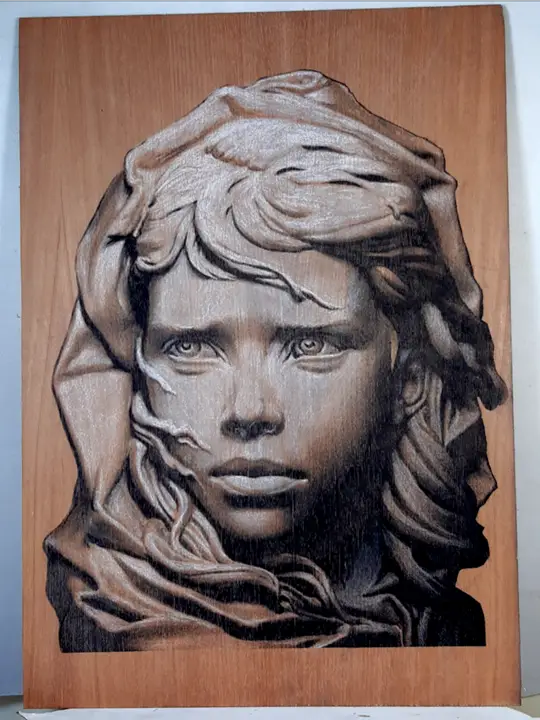
So I need to spend 30 – 45 minutes, or more, adding the missing white highlights with a white pencil, to get the engraving to match, as closely as possible, the processed image.
And I’m finished. The image is 260 x 320 mm on a piece of 270 x 390 mm fairly dark plywood.
Maybe a little more time with the white pencil to smooth out some of the white areas.